Configure New Relic connections for integration with Grepr
The New Relic integration enables you to ingest logs into Grepr with a Grepr source, process them with a Grepr pipeline, and then send the processed logs to New Relic with a Grepr sink.
To send logs to a Grepr pipeline before forwarding the logs to New Relic, you change your collector configuration to send the logs to a Grepr endpoint URL instead of a New Relic endpoint. The Grepr New Relic integration supports the Fluent Bit and Fluentd collectors.
You can use the Grepr UI or REST API to add a New Relic integration. To learn how to create a New Relic integration in the Grepr UI and configure collectors to send logs to Grepr, see Use a New Relic integration in a Grepr pipeline.
To use the REST API, see the New Relic Integration specification.
Although this page describes using an integration to create a pipeline for sourcing and sending data with a single observability platform, your pipelines can use multiple integrations to source and sink data for different platforms. For example, you can create a pipeline with a Datadog integration that’s used to source data from Datadog agents, and a Splunk integration and sink that sends the pipeline output to Splunk.
Requirements
- To create a New Relic integration, you must have a license key from your New Relic account. Use the same license key as the collectors that forward logs to New Relic. This key is required to authenticate the connection between Grepr and New Relic.
- (Optional) To enable Grepr’s automatic exception parsing feature, you must have the Account ID and a user key from your New Relic account. See Enable selective reduction with a New Relic integration. The user key must match the one the New Relic collectors use.
Enable selective reduction with a New Relic integration
When you include a New Relic user key and account ID in your integration configuration, Grepr automatically tracks dashboards and alerts configured in your New Relic account. By parsing queries used in these dashboards and alerts and making them available as exceptions to the Log Reducer, Grepr can determine which messages should not be processed.
To learn more about viewing parsed queries and determining which should be used as exceptions, see Identify log events that should bypass aggregation.
To learn more about Grepr log reduction, see Optimizing logs with Grepr’s intelligent aggregation.
Use a New Relic integration in a Grepr pipeline
Use the following steps to create a New Relic integration in the Grepr UI and use it in a pipeline to source and sink data.
Step 1: Create a New Relic integration
To create a New Relic integration in the Grepr UI:
-
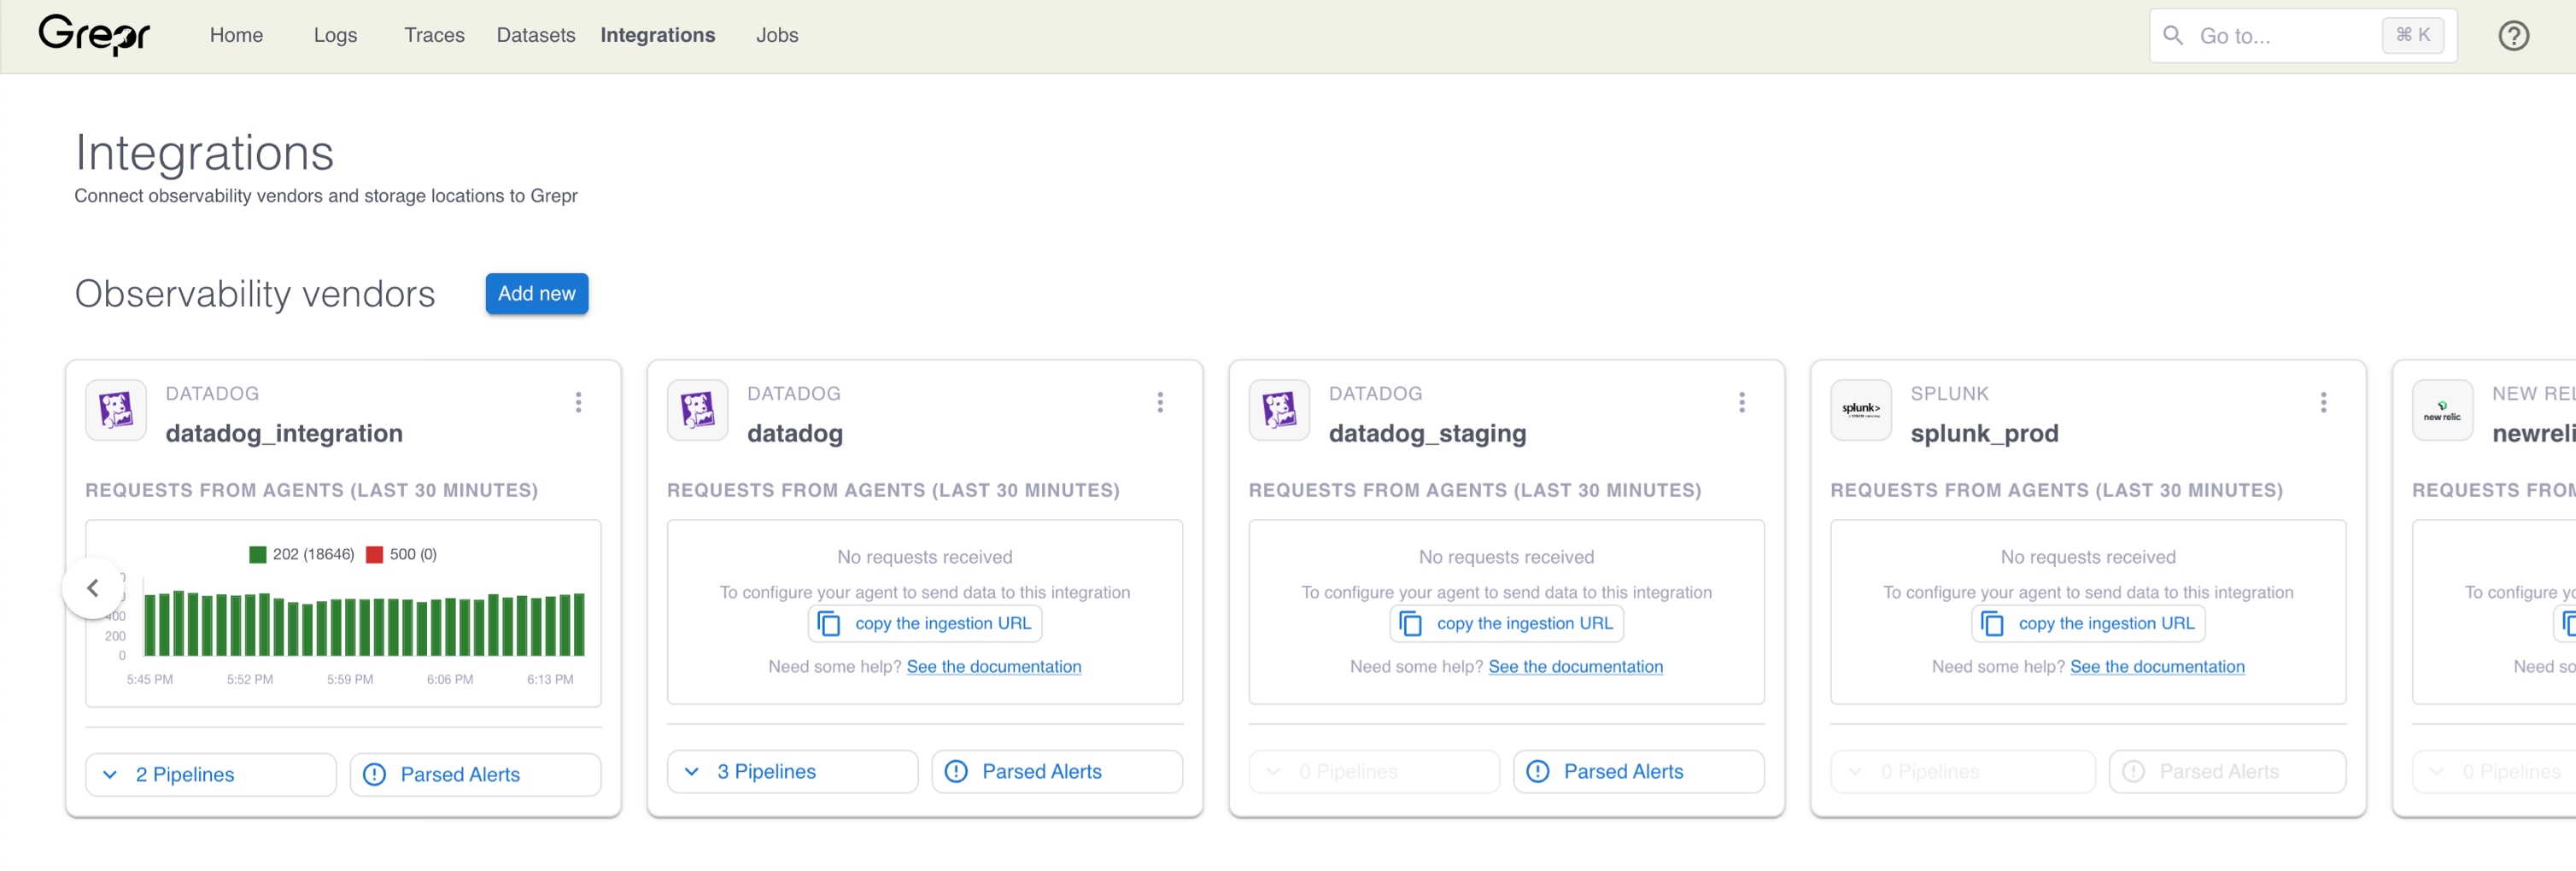
Go to the Integrations page in the Grepr UI and click Add new next to Observability Vendors.
-
In the Add Observability Vendor dialog:
- In the Type menu, select New Relic.
- In the Name field, enter a name for the integration.
- In the License Key field, enter the license key from your New Relic account. Use the same license key as the collectors that forward logs to New Relic. Do not enter a user key in this field.
- (Optional) Enter the Account ID for your New Relic account. This value is only required if you choose to enable Grepr’s automatic exception parsing feature.
- (Optional) In the User Key field, enter a New Relic user key. Use the same user key that the New Relic collectors use. This value is only required if you choose to enable Grepr’s automatic exception parsing feature.
- (Optional) Specify how recently a dashboard must have been accessed to be included in automatic exception parsing. By default, Grepr checks for activity within the last 28 days.
-
Click Create.
(Optional) Grant team access to the integration
When you have teams in your Grepr organization, you can optionally grant access to the integration to one or more of those teams. To configure team access when you create an integration:
-
In the Grant Team Access card, click the plus sign icon (+).
-
Select the team or teams that should be granted access to the integration.
-
Click Create.
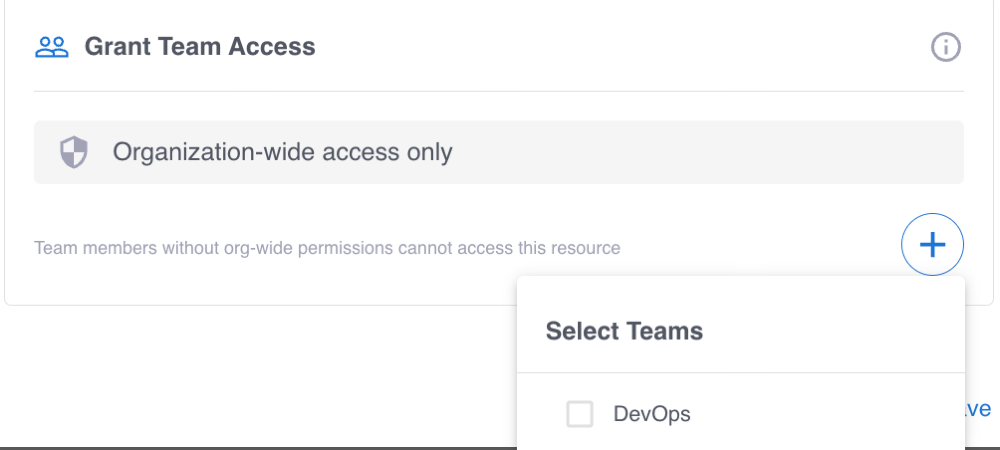
You can also add or remove teams when you edit the integration.
To learn more, see Manage teams in the Grepr platform and Permissions in the Grepr platform.
-
Step 2: Add a source to your pipeline
To add a source to your pipeline that uses the New Relic integration:
- In the Grepr UI, go to the overview page for an existing pipeline or create a new pipeline from the homepage.
- In the left-hand navigation menu on the pipeline overview page, click Sources.
- In the Add source dialog, select the New Relic integration in the Source menu.
- Click Submit.
Step 3: Configure log forwarding to Grepr
To send data to Grepr, you configure your collector or agent to send it to the ingestion URL for your Grepr integration, rather than to your observability vendor’s platform. To find the ingestion URL when using the Grepr UI to configure your pipeline, go to the details page for the pipeline, click Sources in the left pane, and copy the Ingest URL.

When you use the API, you can construct the ingestion URL using the following format:
https://<integration-id>-<org-id>.ingest.grepr.ai/nr/log/v1
Replace <integration-id> with the identifier of the vendor integration used by your pipeline and replace <org-id> with the identifier for your organization.
Although all sources created from the same integration share the same ingestion URL, you can use a single integration to create sources for multiple pipelines. The Grepr platform ensures events are routed to the correct pipelines.
To see more information and configuration examples, select the tab for your preferred log collector:
Fluent Bit
Fluent Bit can forward logs using the New Relic output plugin. To configure the plugin, set the endpoint value to the ingestion URL from your integration and set the licenseKey value to your New Relic license key. The following is an example OUTPUT section from a Fluent Bit configuration file (fluent-bit.conf):
[OUTPUT]
    Name       newrelic
    Match      *
    licenseKey <nr-license-key>
    endpoint   <ingestion-url>
Replace:
<nr-license-key>with your New Relic license key.<ingestion-url>with the ingestion URL from your New Relic integration.
Fluent Bit can also be configured to dual-ship logs to New Relic and Grepr. To do this, add another [OUTPUT] section to the fluent-bit.conf file for New Relic:
# Send logs to New Relic directly
[OUTPUT]
    Name       newrelic
    Match      *
    licenseKey <nr-license-key>

# Send logs to Grepr
[OUTPUT]
    Name       newrelic
    Match      *
    licenseKey <nr-license-key>
    endpoint   <ingestion-url>
To learn more about configuration settings for Fluent Bit, see the documentation for the Fluent Bit New Relic output plugin .
Limitations
- The New Relic integration supports only HTTP/HTTPS connections. TCP connections are not supported.