Route logs to several vendor accounts
Your logs do not all belong in the same place. Separate teams, environments, or business units each own an account in your observability platform, and a log has to reach the account that owns it. Each account you send to is its own Grepr integration.
A Grepr pipeline is a free-form processing graph rather than a fixed shape, so you can arrange this in more than one way. Here are two examples, and you can combine them.
Create a pipeline for each group
Create one pipeline for each group of logs that belongs together, filter its source to that group, and give it the sink for that group’s account.
Each pipeline summarizes only its own logs, so you can tune each one on its own. Choose this when the groups need different configurations, or when you want them isolated from each other.
To create a pipeline, see Tutorial: Build your first Grepr pipeline. To limit what one ingests, see Filter events in a Grepr pipeline.
Group the reducer and filter each sink
Run a single pipeline, add a sink for each account, and filter each sink to that account’s logs. Choose this when the groups have the same configuration, and you would rather manage one pipeline than several.
Routing rests on a routing key, which is a field whose value names the account a log belongs to, such as account or team. Two settings act on it: the reducer groups on the key, and each sink filters on it.
Grouping is what makes the filtering correct. A summary carries the values of the fields it was grouped on, so grouping on the routing key gives every summary exactly one account, and each sink’s filter then matches its own account and no other.
Configure the grouping before you add the sinks, because leaving it out fails quietly. Without the routing key in the group-by, logs bound for different accounts aggregate together. A tag then carries every value the merged messages had, so every account receives the same summary, reporting counts that include the other accounts’ logs. An attribute is merged instead, and the default merge strategy replaces values that differ with a wildcard, so no filter matches and the summary reaches no account.
Step 1: Put the routing key on every log
The routing key has to be on each log before the reducer sees it, holding one value per account. If your collectors already tag logs with the owning team or environment, use that tag. If the value is inside the message, parse it into an attribute or a tag first with the Grok parser or the JSON parser. See Parse log messages to enrich log events with the Grok parser and Transform JSON strings into JSON objects.
A tag and an attribute both work as the routing key. Choose one whose values are few and stable, because each value aggregates separately. Decide what happens to logs carrying no value for the key, which match no filter and so reach no account: give them a default value when you parse, or add a sink that catches them.
Step 2: Group the reducer on the routing key
- On the pipeline’s Reducer step, click Edit on the Fields card.
- If the routing key is listed, set its Behaviour to Match or split.
- If it is not listed, enter it in the Add field row, set the Behaviour to Match or split, and click Add.
- Click Save.
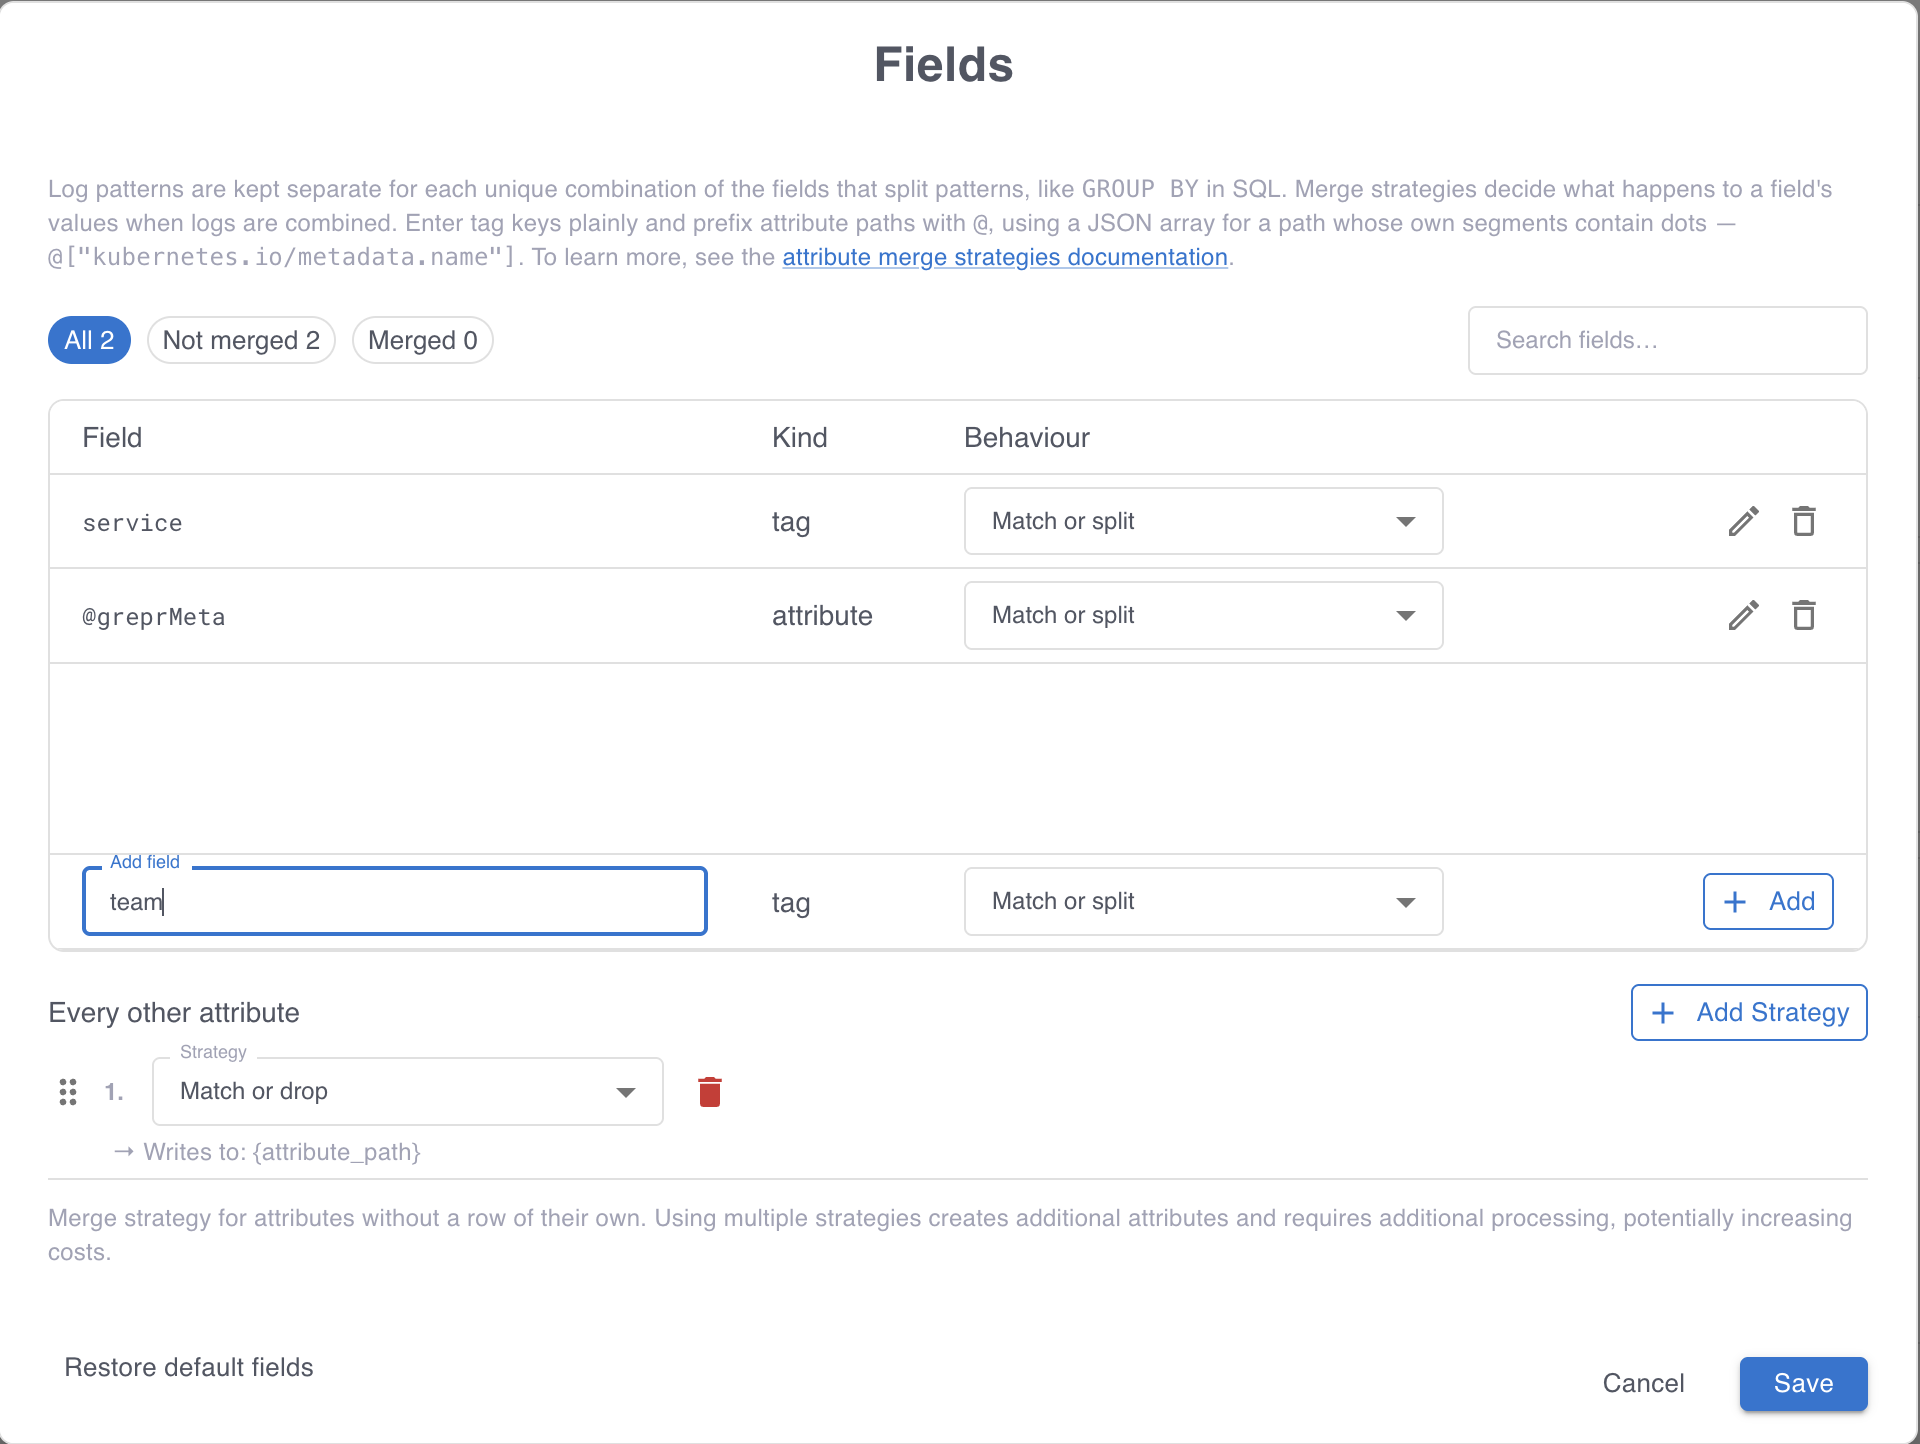
The Match or split behavior keeps a field out of aggregation, so messages whose values differ are never merged into one pattern. Enter tag keys plainly, and prefix attribute paths with @. An attribute is merged as well as grouped, and the default merge strategy keeps the value that every message in the group agrees on. If you set a different merge strategy for the routing attribute, check that it preserves that value rather than combining or discarding it. See Configure how attributes are merged.
Step 3: Create a Grepr integration for each account
Create one Grepr integration for each account you send to. An integration authenticates to a single account, so its credential is what decides where its logs land. Name each integration after its account, because that name is what you select when you add the sink. See Configure how Grepr integrates with observability platforms and cloud storage.
Step 4: Add a filtered sink for each account
Repeat for each account:
- On the pipeline’s Sinks step, click Add sink.
- In the Sink menu, select the integration for the account. Grepr fills in a Name, which you can change.
- In the Query language menu, select the syntax you want to write the filter in.
- In the Filter Query field, enter a query that matches only that account’s logs, such as
team:platform. - Click Add, then save the pipeline.
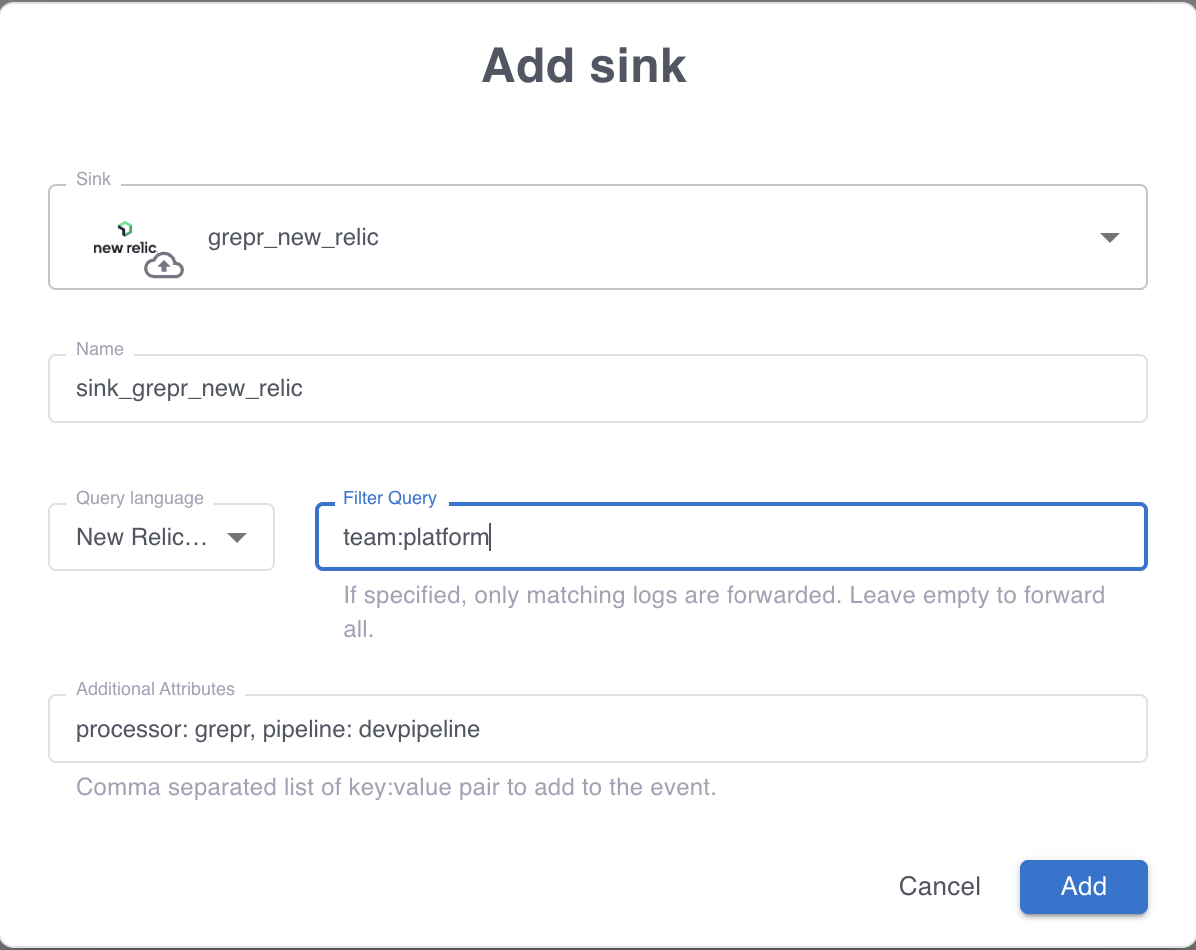
A sink with an empty filter forwards everything, so give each sink a filter query that matches it to one account. A sink’s card reports its filter and shows All messages when it has none, which is how you spot one you missed. The filter runs on everything the reducer emits, so summaries, samples, passthrough messages, and exceptions all follow the same routing. To learn about the filter syntax, see Search logs using a Datadog-like syntax and Search logs using a New Relic log query-like syntax.