Configure MCP server connections with a Grepr integration
An MCP integration connects Grepr to a Model Context Protocol server, or MCP server, run by another system. After you create one, you can let a Grepr AI agent call the tools that server publishes, so the agent gains capabilities, such as reading an incident, querying a dashboard, posting to a channel, or opening a pull request.
MCP integrations, along with the rest of the Grepr AI agent features, are in a closed beta. To request access, contact support@grepr.ai.
This page is about Grepr calling another system’s MCP server. For the opposite direction, where an AI agent, such as Claude, calls Grepr’s own MCP server, see Connect to the Grepr MCP server.
Requirements
To create an MCP integration, you need:
- A credential for the system you are connecting. See Create an MCP integration for where to get it.
What an agent can do through a connected server
The tools an agent gains depend on the server you connect:
| Type | What an agent can do with it |
|---|---|
| Datadog MCP | Read monitors, dashboards, logs, and metrics from your Datadog organization. |
| GitHub MCP | Read and change repository content, issues, pull requests, and workflow runs. |
| PagerDuty MCP | Read and act on incidents, services, and schedules. |
| Slack MCP | Read and post messages in the channels the token can reach. |
Each integration has a server URL you set, so you can point one at a self-hosted or regional endpoint rather than the vendor’s.
Don’t see an MCP in the list? Send a request to support@grepr.ai.
Create an MCP integration
- On the Integrations page, next to the MCP Servers section heading, click Add new.
- In the Add MCP Server dialog, select the server from the Type menu.
- Complete the remaining fields, which depend on the type you selected.
- Click Create.
You cannot change an integration’s type after you create it. You can change its other fields at any time, and each investigation picks up the change when it starts.
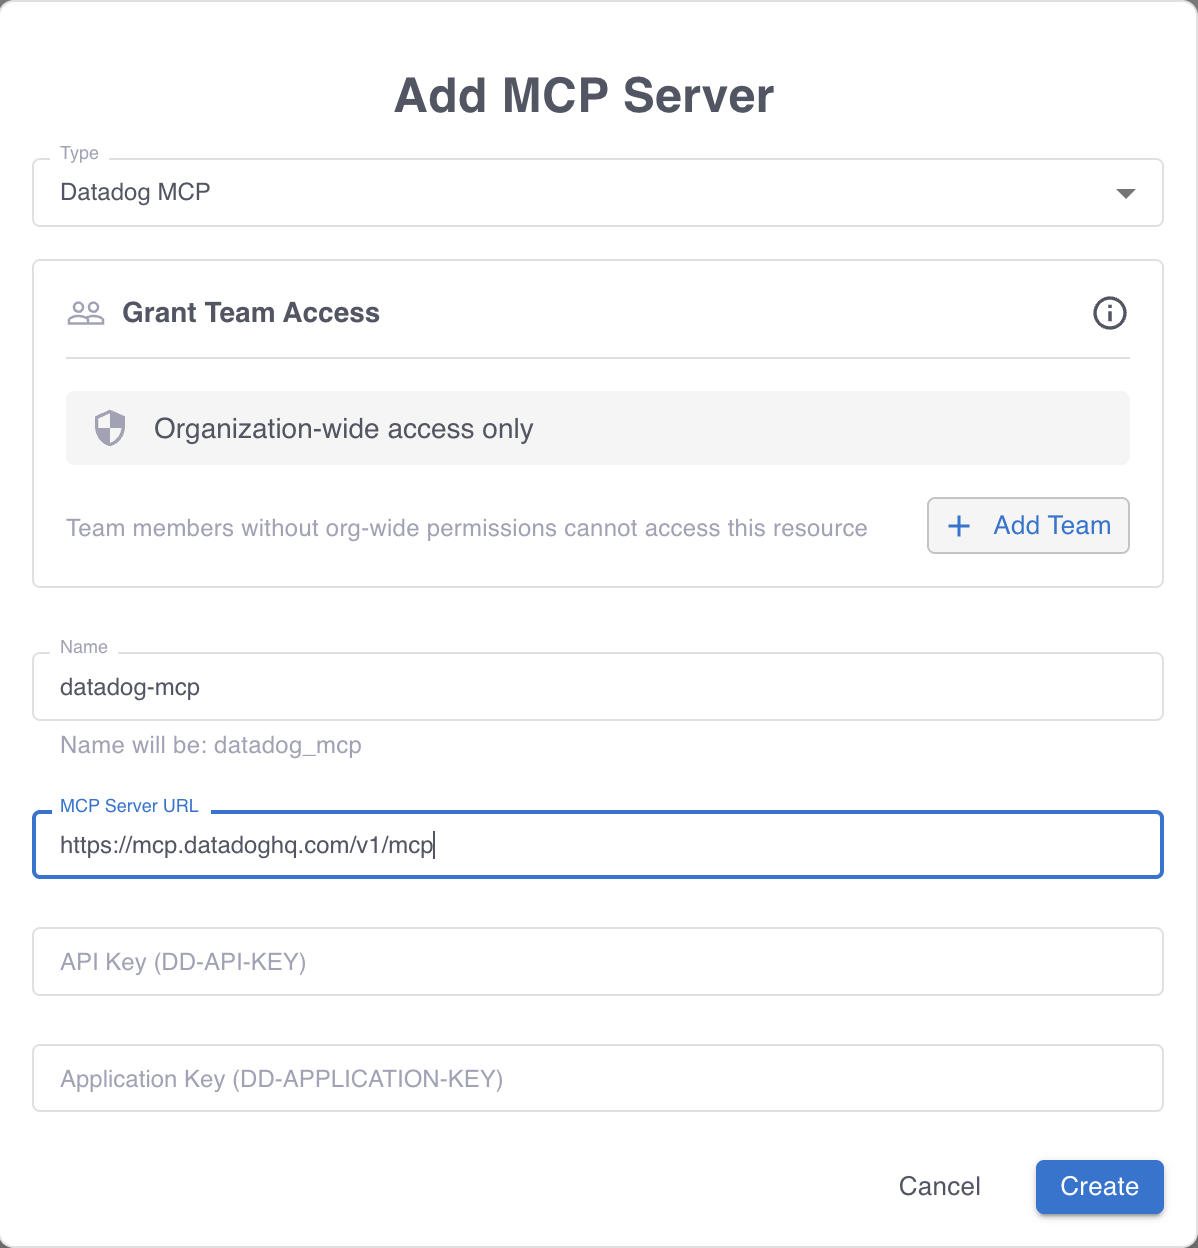
Every type has a Name field, which identifies the integration when you configure an agent, and an MCP Server URL field. The remaining fields are the credential the server authenticates with.
The credential decides what the agent can do through that MCP. Grepr passes it through as you supply it, so give the token minimal access for what the agent needs. Select the tab for the MCP you are connecting.
Datadog MCP
| Field | Value |
|---|---|
| MCP Server URL | https://mcp.datadoghq.com/v1/mcp, or your regional Datadog MCP endpoint. |
| API Key (DD-API-KEY) | A Datadog API key. |
| Application Key (DD-APPLICATION-KEY) | A Datadog application key. |
Create both keys in Datadog under Organization Settings. An application key carries the authorization scopes that decide what the agent can read, so scope it to the data you want the agent to reach, such as monitors, dashboards, and logs. To learn more, see API and Application Keys and Authorization Scopes in the Datadog documentation.
If you already use Datadog as a Grepr source or sink, this is a separate integration. Reusing the same keys is fine. See Configure Datadog connections with a Grepr integration.
Choose which tools an agent can call
Creating an integration does not give any agent access to it. You enable an integration on each agent, and you choose which of the server’s tools that agent can call. Two agents can therefore share one integration with different tool allowances.
The tool allowance lives on the agent, not on the integration. To set it, go to the agent’s Capabilities step, find the integration in the MCP integrations table, and edit its allowed tools. Grepr reads the tool list from the server, marks each tool as read only or writing, and lets you allow all tools or only the ones you select. To learn more, see Let an agent call an MCP server’s tools.
An agent can enable at most one GitHub MCP integration. The agent’s github_code tool also requires an enabled GitHub MCP integration, because that is how it reaches source code.
Grant team access
When you have teams in your Grepr organization, you can grant access to the integration to one or more of those teams. To configure team access when you create or edit an integration:
-
In the Grant Team Access section, click the plus sign icon (+).
-
Select the team or teams that should be granted access to the integration.
-
Click Create.
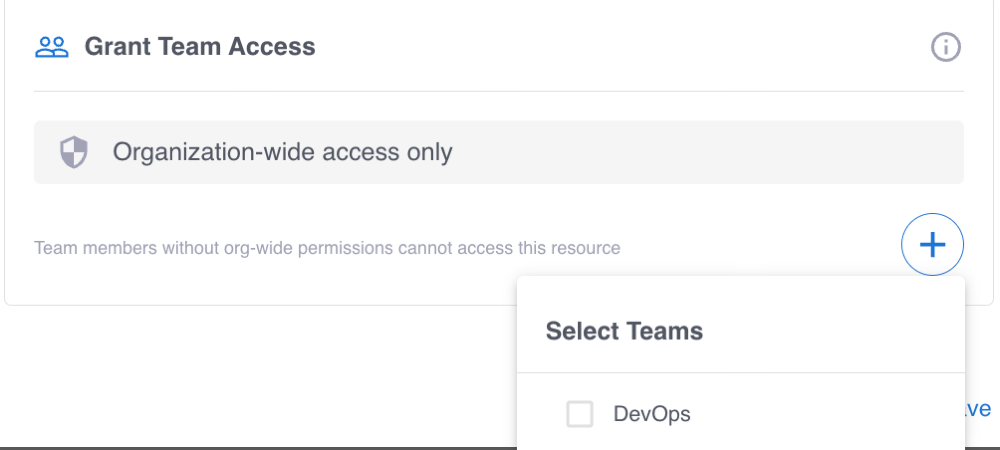
To learn more, see Manage teams in the Grepr platform and Permissions in the Grepr platform.